

| PAPER FOUNDATION PIECING — THE “BASICS”This is a “sample block” for you to practice on, to learn the My Time way to piece on paper foundations. You need a scrap of two different fabrics to construct this block. Click here for the Free Sample Block. |
| 1 . Here is the “color order” for your block. Refer to it as you sew for proper placement of fabrics. I like to color-code the paper block before I sew, and then I don’t have to keep referring back to the instructions as often. Cut a 2″ wide strip from Fabric A, and a 1-1/2″ wide strip from Fabric B.Fabric A: 1, 6, 7, 8, 9 Fabric B: 2, 3, 4, 5 |
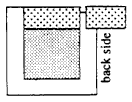
| 2 . Cut a 2″ square from fabric A strip. Center the fabric piece on the UNPRINTED side of the paper, with the wrong side of the fabric against the paper. Hold it up to the light to help with placement, and secure with a tubed glue stick, such as Elmers.   |
| 3 . Turn your paper so #2 is on TOP. Fold the paper toward you, a scant 1/4″ above the sewing line. The sewing line is the line between #1 and #2. Trim excess fabric even with fold, without cutting the paper. Place fabric strip B, right sides together, on top of fabric piece #1. Place end of strip 1/4″ beyond printed line on one side. Line it up even with fold on paper.    |
| 4 . Unfold paper and sew on the line between #1 and #2. Sew with a short stitch length, about 20 stitches per inch (I set my Bernina to 1-1/2). It scores the paper so you can remove it easily later on. You do not need to backstitch. Start and stop 1/8″ beyond the printed line. Flip fabric #2 open and press to one side. Trim excess strip 1/4″ beyond printed line.   |
| 5 . Repeat steps 3 and 4 to sew #3 in place. Turn your paper so #3 is on TOP of the smaller numbers. Fold paper 1/4″ above the sewing line (the line between #1 and #3). Trim excess fabric above fold, position fabric strip, and sew on the line. Flip and press; trim excess strip away.   |
| 6 . Keep repeating steps 3 and 4, following the numerical order printed on the paper block. Remember this “helpful hint”: always turn your paper so the next number to be sewn is on TOP of the smaller numbers. You’ll never stitch on the wrong sewing line if you follow this rule.   |
| 7 . When you are finished you need to add seam allowances to the block. Add 1/4″ seam allowances to all outside edges (the solid lines) and cut away the excess. NEVER cut on the solid lines. These lines are sewing lines only. Peel paper off back of block. A seam ripper is helpful in loosening the edges.   Please note: This sample block was made up of just one unit. Often a design will need to be stitched separately in different units, and then sewn together into the finished block. In this case you don’t add the 1/4″ seam allowance to any of the units until the entire block is sewn together. Please note: This sample block was made up of just one unit. Often a design will need to be stitched separately in different units, and then sewn together into the finished block. In this case you don’t add the 1/4″ seam allowance to any of the units until the entire block is sewn together. |
[ Home ] [ Santa Trees ] [ Bunny Tales ] [ Spring Tulips ] [ Amish Windmills ] [ Uncle Sam & Company ] [ Ghouls on Parade ] [ Christmas Memories ] [ Slice of Summer ] [ My Summer Garden ] [ The Nutcracker ] [ Waiting for Santa ] [ Pieceful Hearts ] [ Into The Woods ] [ All-a-Flutter ] [ Simply Amish ] [ In Bloom ] [ Warm Hands ] [ Seeds to Sew ] [ Home For the Harvest ] [ Stitched for Christmas ] [ Trim the Tree ] [ Patch Purses ]
If you have questions about any of the items on this site, please send mail to [email protected]


